Getting Started
This is a step-by-step set of tasks to take your Pi app from 0 to 1 and make it available to users in the Pi ecosystem. For a faster way to add transaction processing to your app, see our Quick Start page after completing the checklist below.
- Register for an account and complete initial setup
- Register your app
- Use Pi Sandbox for development
- Access production app
- Launching on Pi Mainnet
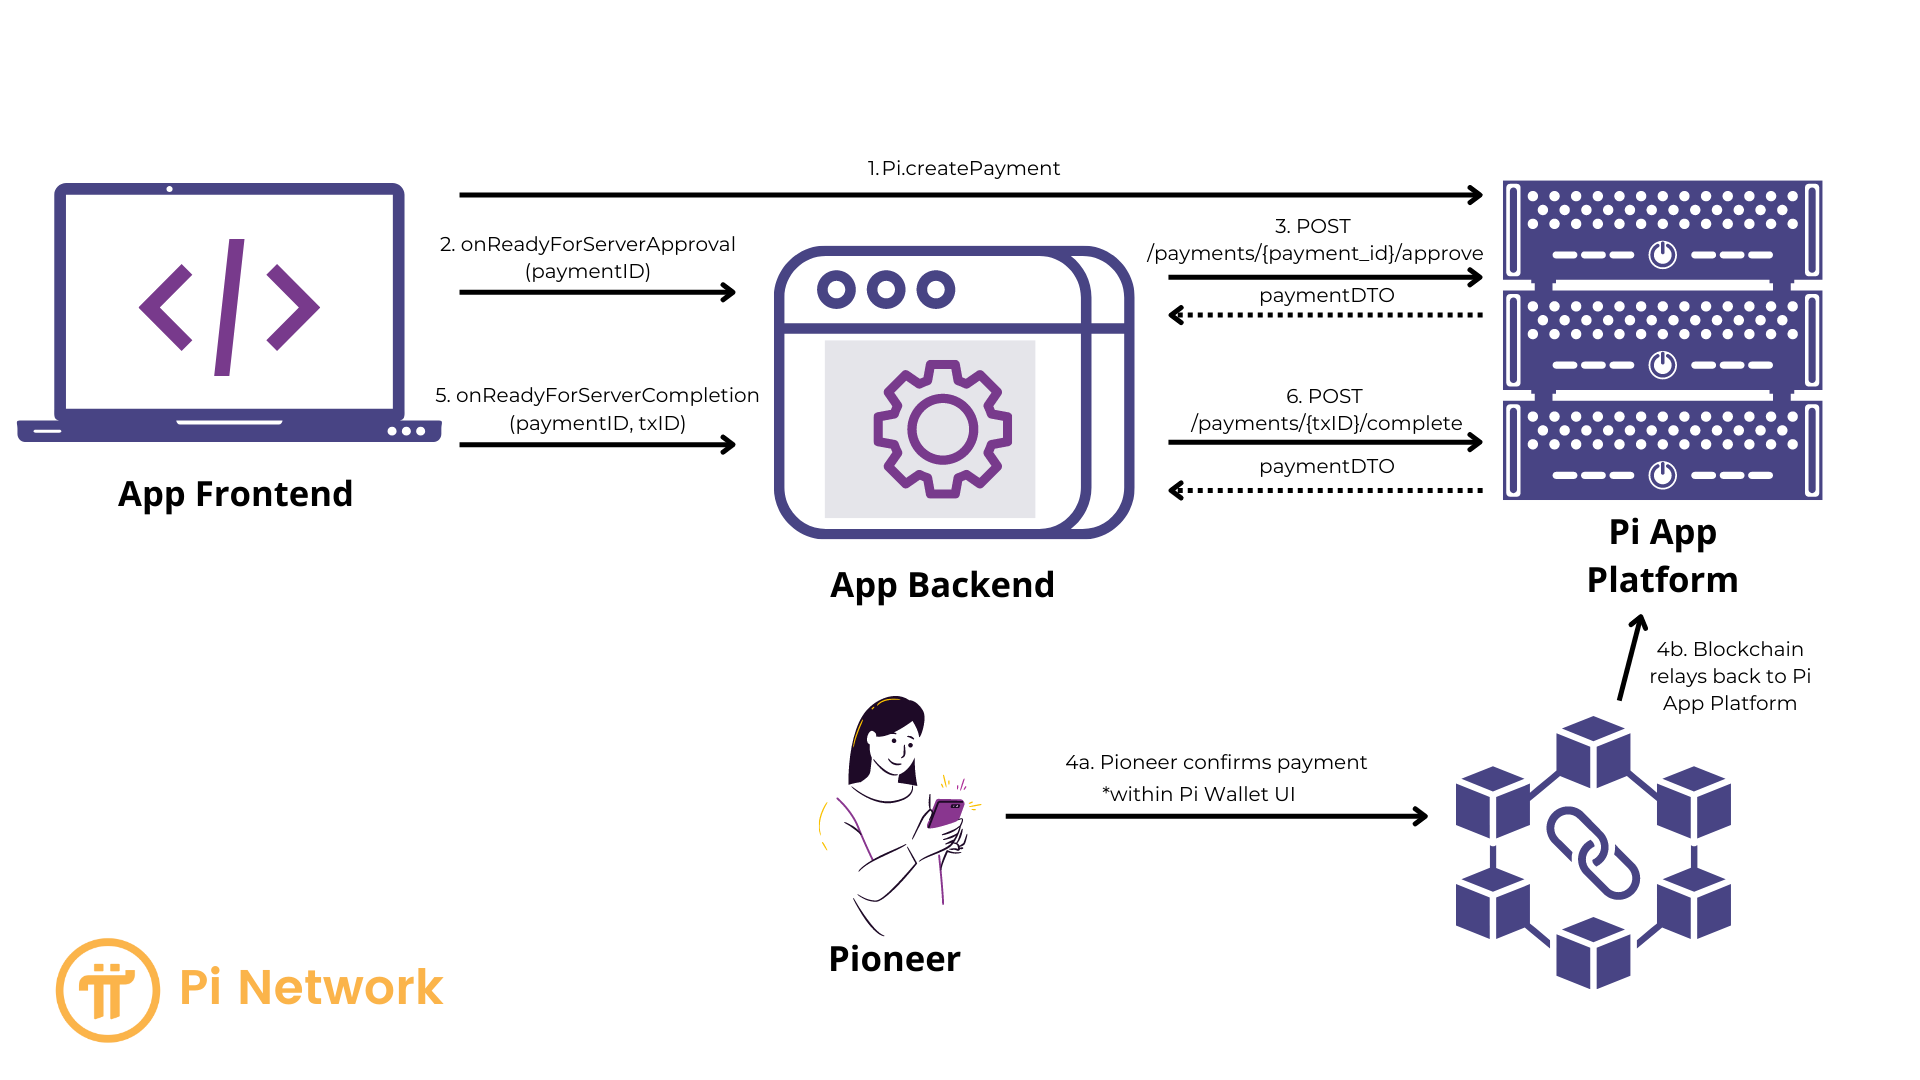
Architectural Overview
In practice, a Pi app typically includes:
- an App Frontend
- using the Pi SDK to authenticate and complete payments
- an App Backend
- using the Platform PI to verify and complete payments.
These components interact with the Pi App platform. The foundational Pi SDK library works at this level. Several helper packages are available to simplify the your development effort.
Demo Apps
Have questions or want to see how other applications are building on and leveraging Pi. Check out the demos below that showcase how to build on Pi.
Pi Bakery
Built by the Pi Core Team this application leverages the Pi SDK and APIs. Users can interact with this application on the Pi Testnet from, demo.pi. This application code is available on Github.
GenAI Guidance
Use helper packages first. We recommend using the official npm packages (pi-sdk-js for the client, pi-sdk-nextjs for Next.js, pi-sdk-react for React, pi-sdk-rails for Rails, etc.) instead of integrating directly with the foundation SDK (window.Pi / pi-sdk.js). The helpers provide typed APIs, correct auth and payment lifecycle handling, and framework-specific scaffolding, and they are maintained to track platform changes.
Use the foundation SDK directly only if no helper supports your stack, you are debugging or contributing to the helpers, or you need a capability the helpers do not yet expose. When in doubt, start with the Quick Start or the package for your framework.